Changelog

Follow new updates and improvements to Orah.

Create and Filter by Custom Transport Types

Demo:

The Snapshot

You can now create your own transport options like "Bus to Airport" or a named shuttle route right alongside Orah's built-in ones. Set them up once in a new Transport Settings tab, then filter and export your passes list by any transport type, including the ones you create.

What's New

Head to Pass Settings → Transport Settings to add, edit, deactivate, or delete transport options, each with its own name and optional extra details like Airline or Flight Number. If a pass type already has that transport option's extra details configured, later changes to the Transport Settings template won't overwrite them but pass types that haven't configured it yet will pick up the current template automatically. When staff pick a transport option while creating a pass, any extra detail fields already set up for it fill in automatically, and staff can still tweak those fields for that one pass without changing your global settings.

Why It Matters

Every school tracks transport differently a named bus route, a specific shuttle service, a partner airline shuttle. Instead of forcing everything into a handful of generic categories, you can name transport the way your school actually talks about it, then find and export exactly the passes that used it. And because edits only apply going forward, changing or removing an option never disrupts a pass that's already scheduled.

Next Steps

  1. Go to Pass Settings → Transport Settings

  2. Click Add Transport Option, give it a name (up to 30 characters) and any extra details you want collected

  3. Toggle options active or deactivated, edit, or delete them any time — changes apply to new passes only

  4. On the Passes list, use Filters → Departure/Return Transport to filter by any type, including your custom ones, then export as usual
New Feature

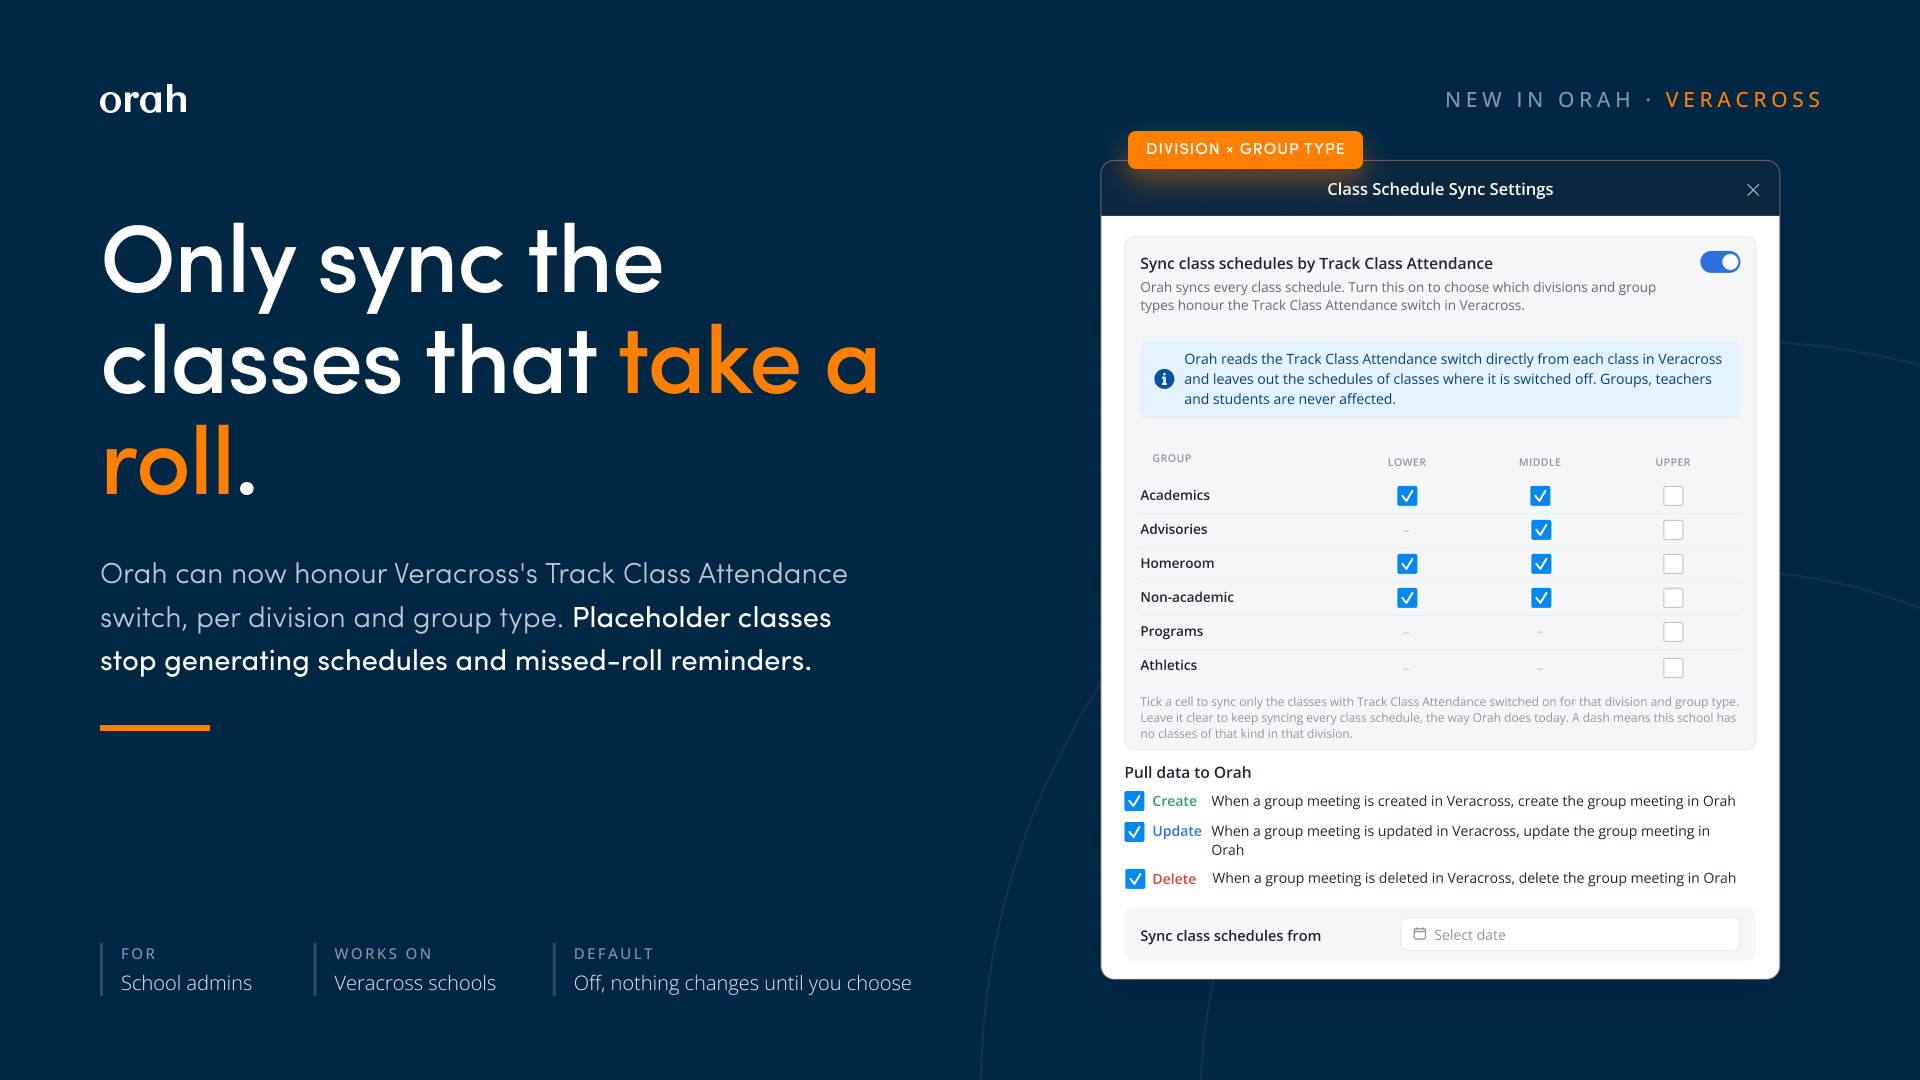
Veracross: only sync the classes that take a roll

Image

Overview:

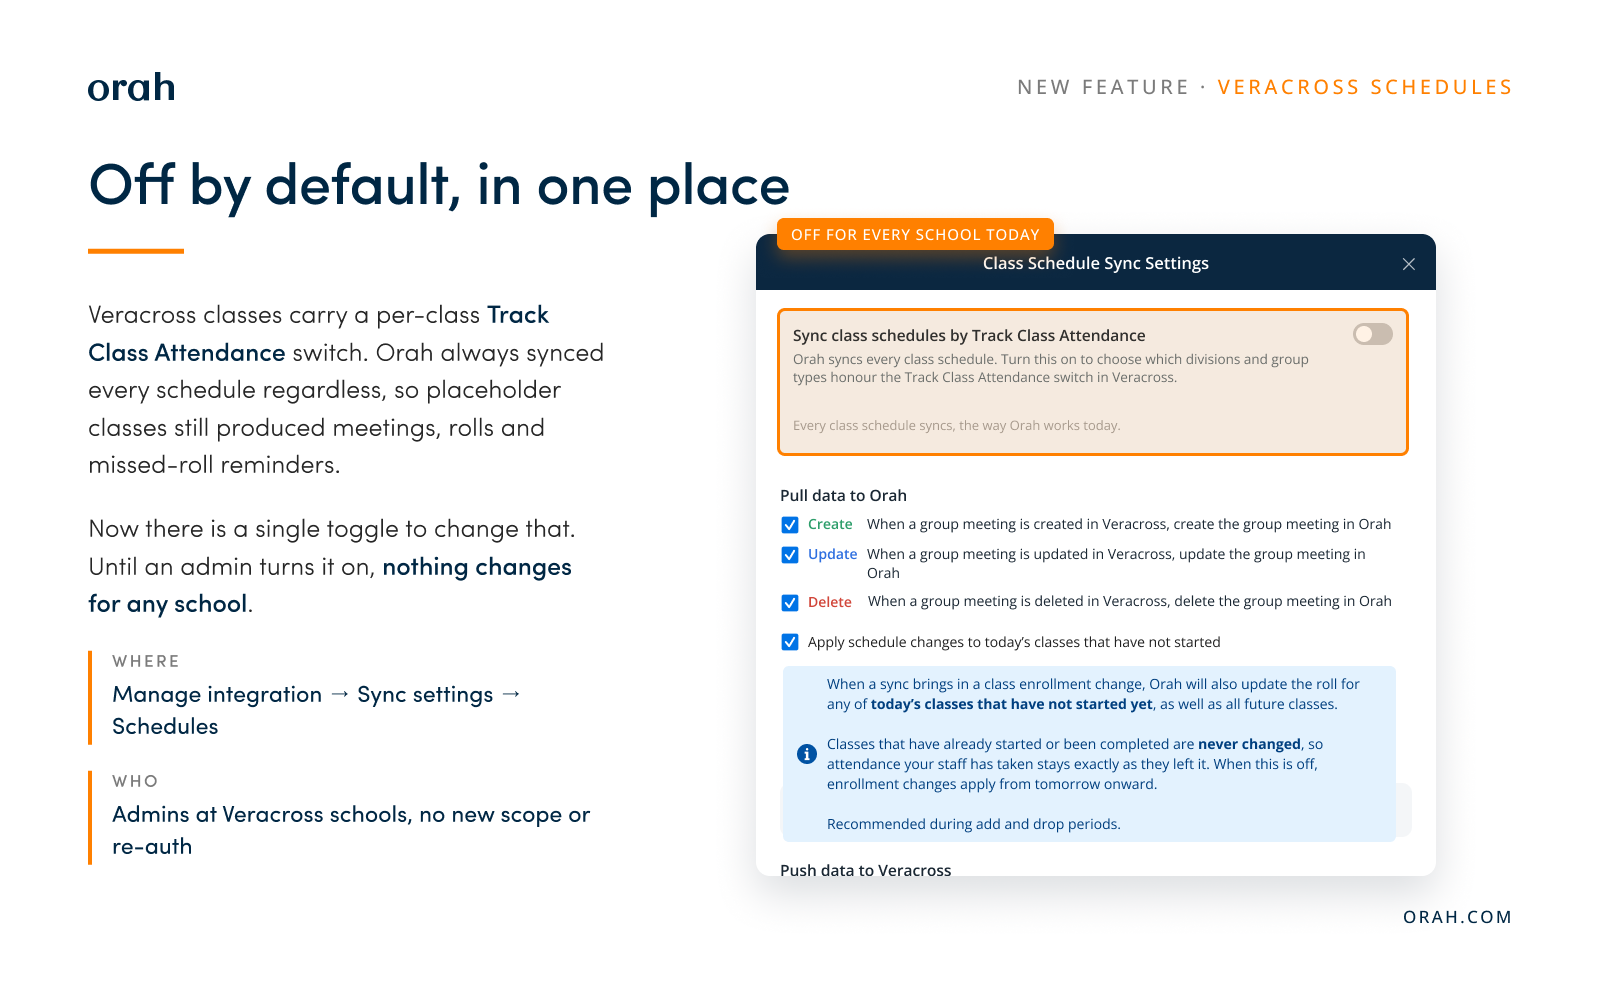
Every Veracross class carries a Track Class Attendance switch. Orah synced every class schedule regardless, so a study hall block or a Lower School homeroom that nobody takes a roll for still produced meetings, empty rolls, and reminder emails to teachers about attendance nobody expected them to take.

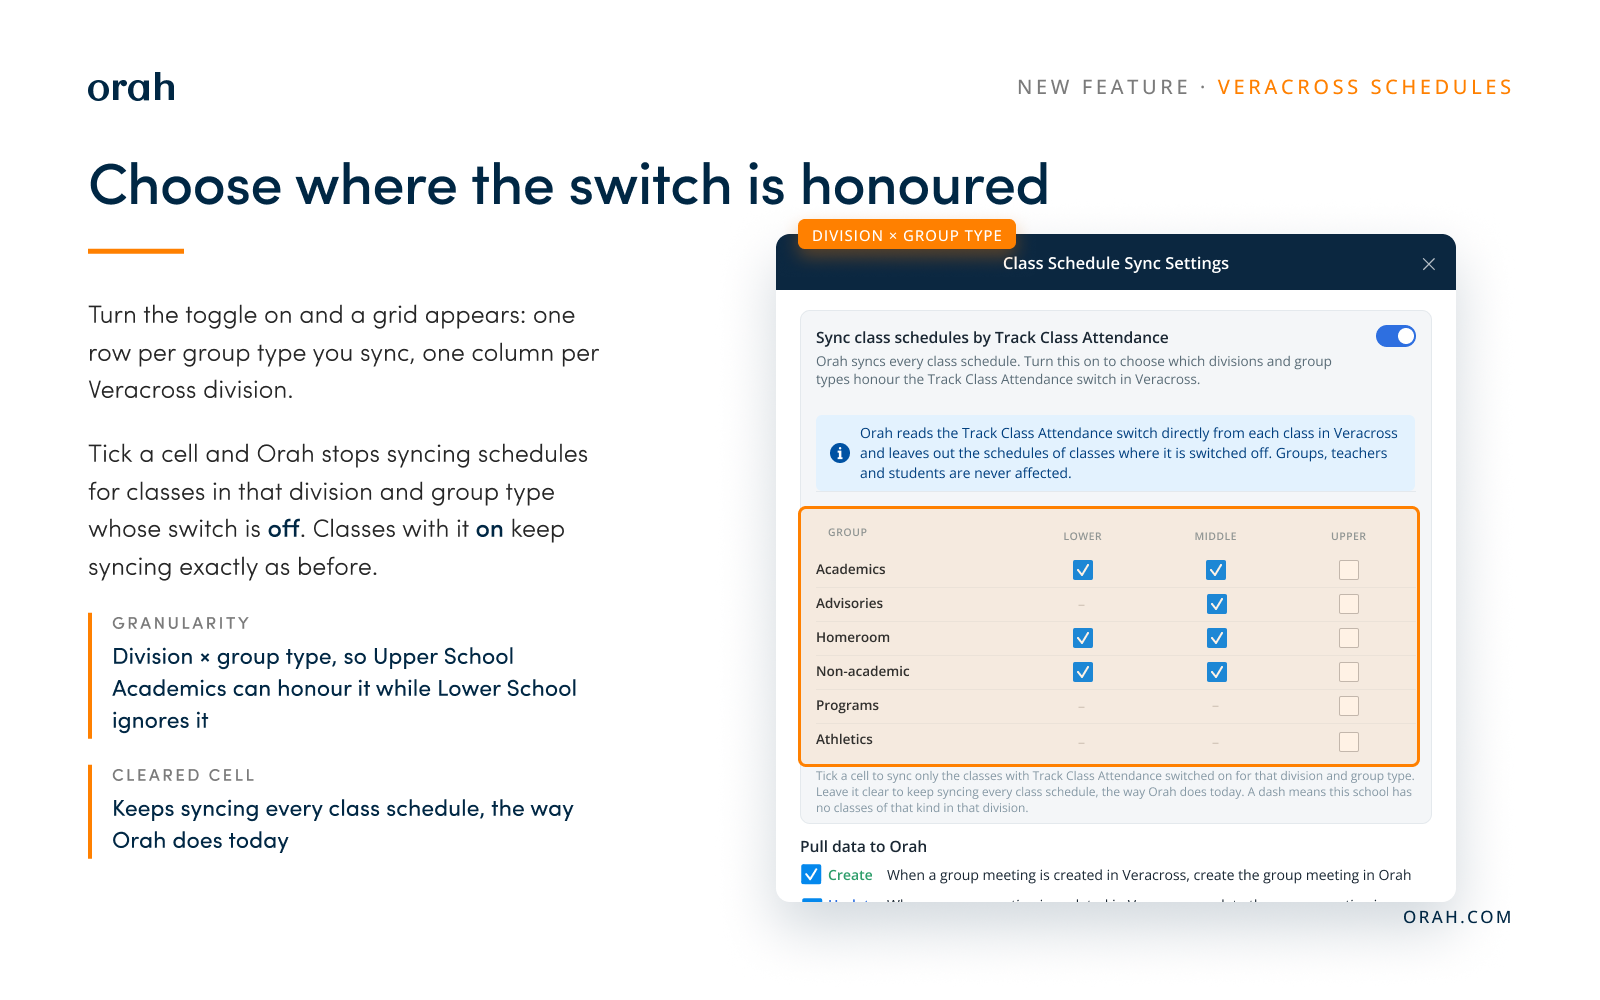
A new toggle on the Schedules sync tab, Sync class schedules by Track Class Attendance, opens a grid of divisions and group types. Tick a cell, and classes in it with the switch off stop syncing schedules. Classes with the switch on keep syncing exactly as before.

Image

How it works

  1. Open Manage integration for your Veracross connection, then Sync settings and the Schedules tab.

  2. Turn on Sync class schedules by Track Class Attendance.

  3. Tick the cells where you want the switch honoured. Leave a cell clear to keep syncing every schedule in it.

  4. Save, then run a Groups and Schedules sync or wait for the next scheduled one.

What happens when you tick a cell

  • Say your Lower School has 42 homeroom classes in Veracross. Thirty of them are pastoral homerooms where nobody takes a roll, so Track Class Attendance is switched off. The other twelve do take a roll. You tick the one cell where Homeroom meets Lower School, save, and run a sync.

Good to know

  • Off by default, for every school. Nothing changes until an admin turns the toggle on and ticks at least one cell.

Image
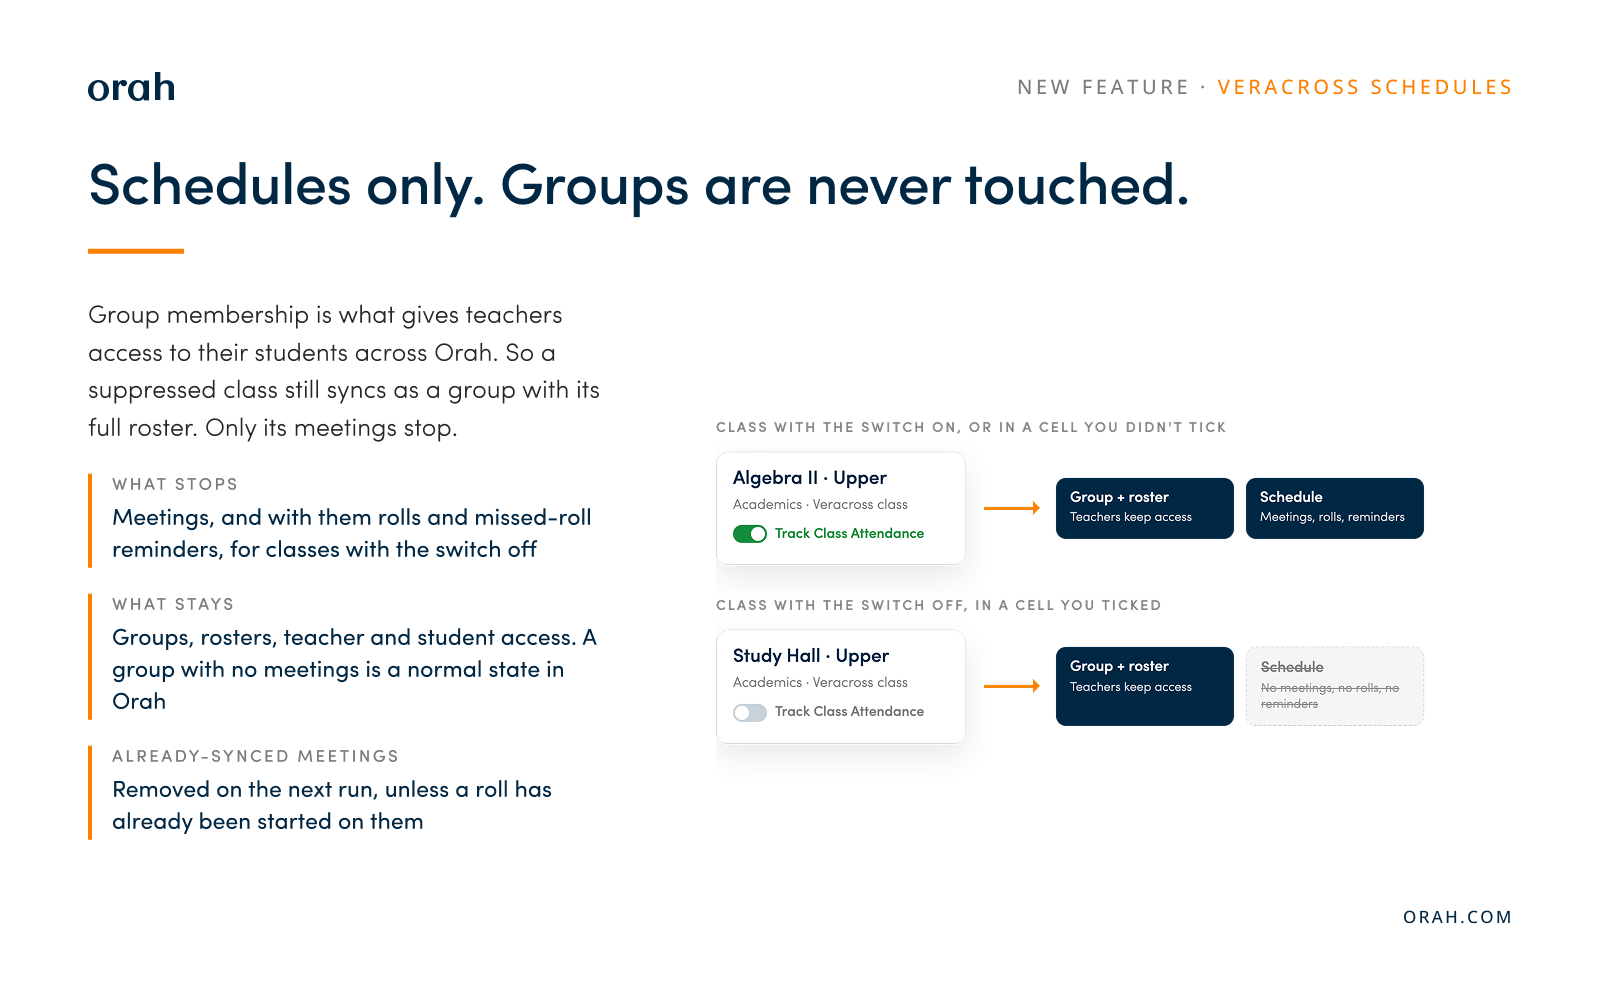
  • Schedules only. Groups are never touched. Group membership drives teacher access to students, so a suppressed class still syncs as a group with its full roster. Only its meetings stop.

  • Already-synced meetings are removed on the next run, unless a roll has already been started on them.

  • No new Veracross scope or re-authorisation. Orah reads the switch from the class list it already pulls.

  • Athletic practice schedules keep their own toggle on the same tab, now labelled Sync athletic practice schedules.

    Image
New Feature

Search Contacts by Their Own Name or email

Overview:

The search box on Admin > Contacts now matches a contact's own name and email, not just the student they are attached to. Previously an admin who knew the contact but not the student had no way in, because contacts frequently have a different surname from their student. They had to work out the student's surname first, then search that. Contact matches are added to the results you already got, so nothing about searching by student changes.

How it works

Go to Admin > Contacts.

Type a contact's first name, last name, or any part of their email address into the search box. The placeholder now reads "Search student or contact…".

Students who have a matching contact appear in the results, with that contact visible in the row.

Searching a student's name works exactly as it did before.

New Feature

Earlier updates